Another Weekend gone by ! My oh My ! I’m feeling a little like this cutie in the pic – Poof – Snap – and the Weekend is gone ! This whole thing still feels a little surreal to me. … Continue reading

Another Weekend gone by ! My oh My ! I’m feeling a little like this cutie in the pic – Poof – Snap – and the Weekend is gone ! This whole thing still feels a little surreal to me. … Continue reading
People often say that good things come in threes…
Well I beg to differ… because this blog post is all about Twos.
# Two New favourite finds
# Two very Easy Christmas D.I.Y gift ideas
and
# Two new jewellery pieces.
❤
Happy Monday Everyone !
On the weekend My sister-in-law and I got sucked into the busy shopping scene at our local markets.
We do swear though, we were only there to buy lunch and get out.
As we caught a glimpse of these two stalls we just couldn’t resist, and I honestly think they are too good to miss which is why I am sharing them with you.
> Our first New favourite find was Willow Boutique. <
This small boutique had the most adorable handmade gifts for Children, Especially Baby boys !

The cutest bow ties with some really beautifully boyish prints fit for any little monkey !

How clever that the bow ties clip onto the rompers !
Making it almost effortless for the Little man to look Classy.
A quick and easy job for any mother.

They also had a wide variety of bibs, blankets and dummy chains.

If you like what you see, I know my sister-in-law and I definitely did, Then why not visit them at the Rouse Hill markets or better yet why not like their page on Facebook.
https://www.facebook.com/willowboutiquemarket

If you are looking for any gift ideas for a new born then Willow Boutique would be the perfect stop for any Mum and bub.


> Our second Favourite find was Luka Candles! <

Hand poured Candles with delicious scents.
I’m really loving all these uniquely scented candles that are trending in the markets right now. I think Luka Candles has been my favourite so far.
Reasonably Priced and with so many scents to choose from, there is one suitable for all of us.

Love the packaging !
Super Shabby !

They have also got some really great beach inspired decorations if you’re looking for a last minute Christmas gift !
Don’t Forget to like them on Facebook.
https://www.facebook.com/LukaCandles

❤
>Moving onto our Two Very Easy D.I.Y Christmas Gift Ideas<
#1
A Santa Sleigh made with Lollies.
A great idea for either Children or your colleagues at work.
Something creative and Edible… Too perfect !

For the lollies in this particular sleigh we have bought Normal Sized Candy Canes and a few boxes of Cadbury Favourites Chocolates.
#2
Personalised Mugs !…
Fill with lollies of course and decorated.

My mother Works in a retirement village so she wanted to do something a little more personal for the residents.
If this sounds more like something you want to do, You can get these really cool Pens from Either Spotlight/Lincraft or any haberdashery store.
They are called UNI pens, But make sure you get the right one – just ask the staff you want something to write on mugs to set.
All you have to do is Draw your design on the mug, When you are finished set your oven to 160 degrees Celsius, pop them in there for half an hour.
Voila – Mug is done and Pen ink has set!
BECAREFUL not to burn yourself – Leave the mugs to cool for at least an hour.

When the cup has cooled, Fill it up with desired lollies – preferably wrapped ones.
Wrap it up with some cellophane and decorate with ribbons and bows.
Honestly, IT IS REALLY EASY


> And Finally we come to our two new jewellery pieces. <
I don’t really buy much commercial jewellery but these two were just too cute to resist !

Trying on all the rings and jewellery at Colette by Colette Hayman.

and what do you know… It’s purchased !
Well I hope Everyone has a had a great Monday and that this post helped you in some way ![]()
Let me know how you go !

I’m off to Watch some Marilyn Monroe !
xxxx Much Love,
yours Truly
RHYversusWORLD
Happy Hump Day Everyone !
Today’s post is a fun D.I.Y project for those of you who’d like to refresh your boring wardrobe pieces.
Over the weekend I was forced to clean out my drawers and while it was easier to part with some pieces, there were quite a few I just wasn’t ready to toss !
So what happens when you don’t want to throw away your favourite tee, the graphics are almost fading, and you’ve worn it a hundred times ?!
Well..You come here, to my blog and you watch my D.I.Y Re-fresh and Re-invent series.
Part one is below. It’s super easy, super fast and I hope you enjoy it !
Oh and you don’t need crazy sew skills either !
Let me know what you think !
xoxo Much love, Yours Truly
RHYversusWORLD

As promised, Here is my post on D.I.Y Wooden cut-outs RHY Style.
I’ve always wanted to have stylised wooden letters, not just the regular white ones you always see in shop windows, but the crafty D.I.Y styled ones that have a touch of emotion and nostalgia, something a little more personal. So while my room is in the making, I have been busy coming up with ideas and inspirations with things that I love.
Paris being one of them !
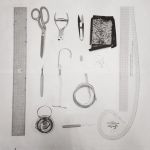
Now for this project all you need is:
1 – Some wooden “Kaiser Kraft” cut-outs that look like this. I have bought mine from Spotlight in Australia. You can get them from any crafts and hobby store that sells sewing equipment and scrapbooking supplies. The two packets that I bought had these particular ones in them.

2 – Big wooden letters and words for D.I.Y can also be found at these stores however you can get them from hardware stores as well. I have bought my wooden Word from “Bunning’s” and as you can see I’ve chosen the word LOVE ❤

3 – Some paint – any colour you like, and to be honest it can be any paint around the house. You don’t really need much of it depending on what size your word is. I’ve just used some gouache paint I had leftover from my colour theory classes in design school. You can use the same too. (If you find gouache paint a little to expensive, you don’t have to get an artist grade one, you can just get a cheap one from the dollar store. – it really doesn’t matter what kind of paint it is – we want something that dries quickly for effect)

4 – Scrap booking or craft paper of your choice. ( This depends on what you wish to cover your wooden cut-outs in. If you want to have them just painted then you need not worry about the paper, however it does at quite a nice clean-cut effect to really make things stand out)
Scrapbooking paper can be found in A lot of places, stationary stores, fabric and craft and hobby stores – a great one for bulk and reasonably priced variety is Alice in paper land. Be sure to Google them.

AND you will obviously need, a pencil, scissors, 2 paintbrushes ( one for glue and the other for paint) , some fabric glue,or craft or wood glue – anything that bonds really, some rolls of thin coloured satin ribbon ( your choice), paper towels, scrapbooking or craft paper.
Let’s Begin
1 – Layout some paper towels, two layers of it, in the length of your letter/word ( This is so we don’t ruin the lovely bench top you are working on ha-ha )

2 – Squeeze a small pee size amount of gouache, or whatever paint in whatever colour you are using for the wooden word onto either the paper towel, your brush or the word itself ( whichever way you work comfortably) and start by dabbing the paint onto wood. ( keep applying more paint as you are dabbing across the word, the quicker you work and dab the better it is when working with gouache. )

3 – The look we are going for isn’t a nice brush stroked finish, it’s a dabbed, vintage style application. So rough brush marks done via dabbing the paintbrush onto the wood will create this effect. ( However, if you want it clean cut then by all means go ahead and paint it the way you like ). If you look closely into the images you will see the effect I am talking about.
Note: if you are working with gouache, I found that it dried pretty quickly as I was dabbing it, this helps create that effect even better.It also means you have to move quickly along the word without applying wet gouache in semi-dry areas or else patching will occur. If patching does occur, simply wait for the whole word to dry and apply the second coat again by dabbing.

4 – Okay so we leave it aside now and wait for it to dry. It must be dried properly or else patching will occur. If it does – just read the above note.
5 – We also want to get into the sides of the letters on the wood to give it a roughed up paint look.

5 – As you can see in the image above, I haven’t applied paint again to my brush, just with the amount of paint on my brush I am rubbing the paintbrush so it has a painted but-not effect.
Prepping the cut-outs
Now we move onto prepping the cut-outs. So for the final product I painted my cut-outs but in case you have chosen the method of covering them with paper here is how to do it.
1 – First place your cut-out on the paper and see where you would like certain parts of it to fall. I have placed mine on a diagonal as I wish half words and half images to fall on the wood.

2 – We now trace around the it with our pencil and we cut it out.

3 – Glue the paper to the cut-out using our craft glue

I’ve just got fabric glue – it doesn’t REALLLYYY matter, just use anything that bonds around the house that isn’t going to seep through the paper.

4 – Brush the glue onto the cut-out and then carefully place the paper onto it.

5 – Turn the cut-out around. As you can see there are some parts that are slightly bigger than the cut-out. If you can, get your scissor or blade and just carefully cut it away.

6 – OR you can also use your scissors to smooth down the edges around the wooden cut-out.

7 – To add final touches to your mannequin we can cut some of our coloured satin ribbon and fold it into a bow.

8 – We then just glue it onto our cut-out piece wherever we like.
You can also use sequins or beads, even feathers to get the effect you like.

As I mentioned before it really makes the idea stand out – When I chose these wooden mannequins I also went searching for patterned paper or something that was very “fashiony” and stood for “raw design” and there I found scrapbooking paper with illustrations and pattern instructions – as we can see it looks very nice and the final touch of adding a bow completes this cut-out.
Painting our pieces.
1 – Place the cut-out down onto the paper towel, apply the paint and again just dab it on.

2 – As it comes to dry, lightly place another paper towel on top and press it.
This will get rid of any excess gouache and will also help it dry faster. ( less mess ![]() )
)

3 – Peel it back

and now we add our extras.
4 – Again you may add other bits and pieces that you like, or you can even leave it plain.

I’ve just added a red bow, as it looked nice with the black/brown paint on the Eiffel cut-out.

I used this craft ribbon. It’s 3mm wide and is great for craft use ! I bought it from spotlight but I’m sure you can get it from any craft and hobby store, even cheap dollar stores. They come in a wide range of colours and even have other widths.

5 – after we have prepped our piece, we then glue the back of it and place it on the wooden word (wherever you like to put it – I would suggest before you start you figure out exactly where you like it before painting )

Ta-Da ! there is our Eiffel

I’ve also decided to add a lamppost – again we prep the piece with paint.

Dry it

Now this time I am going to add a bit of paper to it to create that signage effect. I quite like the colour of this coffee stained paper so I’m just going to cut a square out – roughly by the measurements of the space where the sign is on the lamppost.


Glue it down and stick it on


We are not going to dab around the cut edge with our black paintbrush to give it a blended vintage effect and to create some layering.

This is the kind of effect you get

Some final touches to our wooden word before applying the lamppost to it.

Gluing some of the red ribbon just on the bottom edge of the Wooden word for added effect and we press it down to hold.

As you can see I have cut the piece of ribbon a little bit longer than the final length so we can glue it and press it right back around


Now we glue on our lamppost

…
AND VOILA !
there we have it…
my Love ❤ for Paris.
Ready for when I move back into my room !

I’m currently waiting for it all to dry but you may choose to write something in metallic pen or ink pen on the lamppost signage.
Well I hope you all enjoyed it and got the instructions = ]
If you have any questions please contact me and drop in a hello
xxxx Much Love, Yours Truly
RHYversusWORLD
